원문 xoppa.github.io/blog/using-the-libgdx-3d-physics-bullet-wrapper-part1/
Using the libGDX 3D physics Bullet wrapper - part1 [번역]
Many 3D games require some sort of collision detection between 3D objects. Sometimes it's possible to do this with some basic math and bounding boxes and bounding spheres. But when shapes get more complicated, the math and code gets complicated as well. Luckily LibGDX comes with a wrapper around Bullet. Bullet is an open source 3D collision detection and phyisics library, making it possible to add collision detection with just a few lines of code. This tutorial will guide you in using the LibGDX 3D physics Bullet wrapper.<more style="margin: 0px; padding: 0px; box-sizing: border-box;"></more>
많은 3D 게임들은 3D 객체들 사이에 어떤 종류의 충돌 탐지를 필요로합니다. 때로는 몇 가지 기본 수학 및 경계 상자 및 경계 구체를 사용하여이 작업을 수행 할 수 있습니다. 그러나 모양이 복잡 해지면 수학과 코드도 복잡해집니다. 다행히 LibGDX 는 Bullet 주위에 래퍼 (wrapper)가있다. Bullet은 오픈 소스 3D 충돌 감지 및 phyisics 라이브러리로, 몇 줄의 코드만으로 충돌 감지 기능을 추가 할 수 있습니다. 이 튜토리얼은 LibGDX 3D 물리 Bullet 래퍼를 사용하는 방법을 안내합니다.
Being written in C++, the Bullet library performs really well. It is used by many commercial games and movies. But that also introduces a problem for us. With LibGDX you write your code in Java and you can't directly use a C++ library from within Java. In fact, the design of the two languages is so different that in many cases a one on one translation without performance loss isn't possible. This is where the "wrapper" comes in. The wrapper is a layer (or "bridge", if you prefer) between the Bullet library and your Java application, while maintaining performance. Because of this, the wrapper adds some changes to the Bullet API.
Bullet 라이브러리는 C ++로 작성되었으므로 실제로 잘 수행됩니다. 그것은 많은 상용 게임과 영화에서 사용됩니다. 그러나 그것은 또한 우리에게 문제를 야기합니다. LibGDX를 사용하면 Java로 코드를 작성하고 Java에서 C ++ 라이브러리를 직접 사용할 수 없습니다. 실제로 두 언어의 디자인이 매우 다르므로 대부분의 경우 성능 손실없이 번역을 수행 할 수 없습니다. 이것은 래퍼가 들어오는 곳입니다. 래퍼는 성능을 유지하면서 불릿 라이브러리와 Java 응용 프로그램 사이의 레이어 (또는 원하는 경우 "브리지")입니다. 이 때문에 래퍼는 Bullet API에 몇 가지 변경 사항을 추가합니다.
As you might imagine, working with the wrapper is therefor a bit different than working with a regular Java library. In this tutorial I assume that you're new to both the wrapper and the Bullet library. If you already have experience with using the Bullet library, this tutorial still might be useful. But you probably also want to have a look at this wiki page, where the important changes that the wrapper introduces are outlined.
상상할 수 있듯이 래퍼로 작업하는 것은 일반적인 Java 라이브러리로 작업하는 것과 약간 다릅니다. 이 튜토리얼에서는 랩퍼와 글 머리 기호 라이브러리를 처음 사용한다고 가정합니다. 글 머리 기호 라이브러리 사용 경험이있는 경우이 자습서가 유용 할 수 있습니다. 그러나이 wiki 페이지 에서 래퍼가 소개하는 중요한 변경 사항에 대해 간략하게 살펴보고 싶을 수도 있습니다.
For this tutorial I assume that you are already familiar with LibGDX and its 3D api. While not required (we'll start from scratch), you might want to read the previous tutorials prior to this one, if you haven't done so. Especially the previous tutorials frustum culling, ray picking and collision shapes are leading into collision detection.
이 튜토리얼에서는 LibGDX와 3D API에 이미 익숙하다고 가정합니다. 필수 사항은 아니지만 (처음부터 시작할 것입니다.) 이전에이 튜토리얼을 읽지 않은 경우이 튜토리얼을 먼저 읽는 것이 좋습니다. 특히 이전 자습서 절두체 컬링 , 광선 피킹 및 충돌 셰이프 가 충돌 감지로 이어지고 있습니다.
This is a two part tutorial. In this first part we'll look at how to setup the Bullet wrapper and use it for basic collision detection. In the second part we'll look at rigid body dynamics. Since I think that's important to have some basic knowledge of what happens behind the scenes, I'll show you what actually happens when you perform collision detection and how you can use the Bullet wrapper to maintain performance.
이것은 두 부분으로 된 튜토리얼입니다. 이 첫 번째 부분에서는 Bullet 래퍼를 설정하고 기본적인 충돌 감지에 사용하는 방법을 살펴 보겠습니다. 두 번째 부분에서는 강체 동역학을 살펴 보겠습니다. 배후에서 일어나는 일에 대한 기본적인 지식을 갖는 것이 중요하다고 생각하기 때문에 충돌 감지를 수행 할 때 실제로 어떤 일이 일어나는지, 그리고 Bullet 래퍼를 사용하여 성능을 유지하는 방법을 알려 드리겠습니다.
Create a basic 3D test scene
So, let's start coding! You can go ahead and create a new LibGDX project, I assume you're familiar with that and will not walk you through it. If you use the setup, you can add the gdx-bullet extension as well. If not, you'll have to manually add it later. When you're all setup, create a class to be the ApplicationListener:
자, 코딩을 시작합시다! 새로운 LibGDX 프로젝트를 만들 수 있습니다. 익숙한 사용자라고 생각하고 그것을 따라 가지 않을 것입니다. 설정을 사용하는 경우 gdx- 글 머리 기호 확장을 추가 할 수 있습니다. 그렇지 않은 경우 나중에 수동으로 추가해야합니다. 모든 설정이 끝나면 ApplicationListener 클래스를 만듭니다.
public class BulletTest implements ApplicationListener {
    @Override public void create () {}
    @Override public void render () {}
    @Override public void dispose () {}
    @Override public void pause () {}
    @Override public void resume () {}
    @Override public void resize (int width, int height) {}
}
Now add the basics that we need for our 3D test, like a camera, camera controller, model batch and environment.
public class BulletTest implements ApplicationListener {
    PerspectiveCamera cam;
    CameraInputController camController;
    ModelBatch modelBatch;
    Array<ModelInstance> instances;
    Environment environment;

    @Override
    public void create () {
        modelBatch = new ModelBatch();

        environment = new Environment();
        environment.set(new ColorAttribute(ColorAttribute.AmbientLight, 0.4f, 0.4f, 0.4f, 1f));
        environment.add(new DirectionalLight().set(0.8f, 0.8f, 0.8f, -1f, -0.8f, -0.2f));

        cam = new PerspectiveCamera(67, Gdx.graphics.getWidth(), Gdx.graphics.getHeight());
        cam.position.set(3f, 7f, 10f);
        cam.lookAt(0, 4f, 0);
        cam.update();

        camController = new CameraInputController(cam);
        Gdx.input.setInputProcessor(camController);

        instances = new Array<ModelInstance>();
    }

    @Override
    public void render () {
        camController.update();

        Gdx.gl.glClearColor(0.3f, 0.3f, 0.3f, 1.f);
        Gdx.gl.glClear(GL20.GL_COLOR_BUFFER_BIT | GL20.GL_DEPTH_BUFFER_BIT);

        modelBatch.begin(cam);
        modelBatch.render(instances, environment);
        modelBatch.end();
    }

    @Override
    public void dispose () {
        modelBatch.dispose();
    }

    @Override public void pause () {}
    @Override public void resume () {}
    @Override public void resize (int width, int height) {}
}
If any of this is new to you, you might want to read this tutorial first.
Time to add some visual objects which we will use for the collision detection.
public class BulletTest implements ApplicationListener {
    ...
    Model model;
    ModelInstance ground;
    ModelInstance ball;

    @Override
    public void create () {
        ...
        camController = new CameraInputController(cam);
        Gdx.input.setInputProcessor(camController);

        ModelBuilder mb = new ModelBuilder();
        mb.begin();
        mb.node().id = "ground";
        mb.part("box", GL20.GL_TRIANGLES, Usage.Position | Usage.Normal, new Material(ColorAttribute.createDiffuse(Color.RED)))
            .box(5f, 1f, 5f);
        mb.node().id = "ball";
        mb.part("sphere", GL20.GL_TRIANGLES, Usage.Position | Usage.Normal, new Material(ColorAttribute.createDiffuse(Color.GREEN)))
            .sphere(1f, 1f, 1f, 10, 10);
        model = mb.end();

        ground = new ModelInstance(model, "ground");
        ball = new ModelInstance(model, "ball");
        ball.transform.setToTranslation(0, 9f, 0);

        instances = new Array<ModelInstance>();
        instances.add(ground);
        instances.add(ball);
    }
    ...
    @Override
    public void dispose () {
        modelBatch.dispose();
        model.dispose();
    }
    ...
}
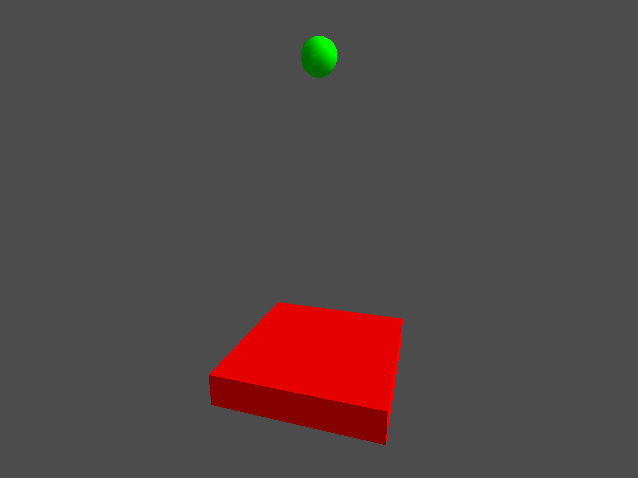
Here I used ModelBuilder to create a model with two nodes. One called "ground" and one called "ball" (read this tutorial if you want to know more about nodes). Next we create a ModelInstance of each Node (as described in this tutorial) and we move the ball a little above the ground. If you run this, it will look something like this:
여기서는 ModelBuilder 를 사용하여 두 개의 노드가있는 모델을 만들었습니다. 하나는 "ground"라고 불리며 하나는 "ball"이라고 불리는 것입니다 (노드에 대해 더 알고 싶다면 이 튜토리얼을 읽으십시오). 다음으로 각 노드의 ModelInstance를 만듭니다 ( 이 자습서 에서 설명한대로). 그리고 우리는 공을지면 위로 약간 움직입니다. 이것을 실행하면 다음과 같이 보일 것입니다 :
Now we're going to move the ball downwards until it collides with the ground. For now, we'll use a method stub for the actual collision detection:
public class BulletTest implements ApplicationListener {
    ...
    boolean collision;
    ...
    @Override
    public void render () {
        final float delta = Math.min(1f/30f, Gdx.graphics.getDeltaTime());

        if (!collision) {
            ball.transform.translate(0f, -delta, 0f);
            collision = checkCollision();
        }
        ...
    }

    boolean checkCollision() {
        return false;
    }
    ...
}
View full source code data-on Github
We added a flag called collision, as long as this flag isn't set we move the ball downwards with data-one unit (e.g. meter) per second. For this we use the Gdx.graphics.getDeltaTime() methods, which gives us the time (in seconds) since the last time the render method was called. Math.min is used to limit this time to a maximum. This avoids "teleportation", e.g. when for some reason a hick-up occurs.
If you run this, you'll see that ball will simply fall through the ground and won't stop.
collision 이라는 플래그를 추가했습니다.이 플래그가 설정되어 있지 않으면 초당 한 단위 (예 : 미터)로 볼을 아래쪽으로 이동합니다. 이를 위해 Gdx.graphics.getDeltaTime() 메서드를 사용합니다.이 메서드는 render 메서드가 마지막으로 호출 된 이후의 시간 (초)을 제공합니다. Math.min 은이 시간을 최대 값으로 제한하는 데 사용됩니다. 이렇게하면 "순간 이동"을 피할 수 있습니다 (예 : 어떤 이유로 hick-up이 발생하는 경우).
이걸 실행하면 공이 땅에 떨어져서 멈추지 않는다는 것을 알 수 있습니다.
Detecting if the ball and ground collide
Time to add some actual collision detection. If you haven't done so already, make sure to add the gdx-bullet extension to your project. You can do this with the LibGDX setup by clicking the bullet extension checkbox. If you prefer, you can also manually add the extension (e.g. by adding the jar to the java build path and the .so files to the android libs folder).
The first thing to remember about the Bullet wrapper is that you can never use the wrapper before it is initialized. This can be done using the static method Bullet.init();:
실제 충돌 감지를 추가 할 시간입니다. 아직 작성하지 않았다면 gdx-bullet 확장을 프로젝트에 추가하십시오. 글 머리 기호 확장 확인란을 클릭하여 LibGDX 설정으로이 작업을 수행 할 수 있습니다. 원하는 경우 확장을 수동으로 추가 할 수도 있습니다 (예 : Java 빌드 경로에 jar를 추가하고 android libs 폴더에 .so 파일을 추가).
Bullet 랩퍼에 대해 가장 먼저 기억해야 할 것은 랩퍼가 초기화 되기 전에 절대로 사용할 수 없다는 것입니다. 이것은 정적 메서드 Bullet.init(); 사용하여 수행 할 수 있습니다 Bullet.init(); :
    @Override
    public void create () {
        Bullet.init();
        ...
    }
It might seem obvious that you can't use the wrapper before it is initialized, but keep in mind that (static) members are initialized before the create method is called. For example (pseudo code):
초기화되기 전에는 래퍼를 사용할 수 없지만 create 메서드가 호출되기 전에 ( static ) 멤버가 초기화된다는 점을 명심해야합니다. 예를 들어 (의사 코드) :
SomeBulletClass member = new SomeBulletClass();or (pseudo code):
SomeBulletCallback callback = new SomeBulletCallback() {
    public void theCallback() {
        ...
    }
}
will not work, because the code (the constructor) is called before the call to Bullet.init(); is executed. Therefor make sure that you always construct any Bullet related objects after the Bullet wrapper is initialized.
Bullet.init(); 호출 전에 코드 (생성자)가 호출되기 때문에 작동하지 않습니다 Bullet.init(); 실행됩니다. 따라서 Bullet 래퍼가 초기화 된 후에 항상 Bullet 관련 개체를 구성해야합니다.
If you added above line (Bullet.init();), you probably want to run the project to make sure that the library is initialized successfully. If for some reason the library (e.g. on windows the DLL file) can't be loaded an exception will be thrown. In that case check your project configuration or try to recreate the project using the libgdx setup utility.
위 라인을 추가 한 경우 ( Bullet.init(); ), 프로젝트를 실행하여 라이브러리가 성공적으로 초기화되었는지 확인해야합니다. 어떤 이유로 라이브러리 (예 : 윈도우의 경우 DLL 파일)를로드 할 수 없으면 예외가 발생합니다. 이 경우 프로젝트 구성을 점검하거나 libgdx setup 유틸리티를 사용하여 프로젝트를 다시 작성하십시오.
Before we can check if the ball collides with the ground, we need to specify the shape of both objects. If you've read the previous tutorial you're already familiar with collision shapes. Bullet provides many collision shapes. Ranging from primitive shapes, like box, sphere, cylinder, cone and capsule, to a more general convex shape, an optimized convex hull shape, mesh shape and any combination of those. For now, a simple box and sphere should be enough for our test:
공이 땅과 충돌하는지 확인할 수 있기 전에 두 객체의 모양을 지정해야합니다. 이전 튜토리얼 을 읽었 으면 이미 충돌 셰이프에 익숙합니다. Bullet은 많은 충돌 셰이프를 제공합니다. 상자, 구체, 원뿔, 원뿔 및 캡슐과 같은 기본 모양에서보다 일반적인 볼록 모양, 최적화 된 볼록한 선체 모양, 메쉬 모양 및 그 조합으로 확장됩니다. 지금은 단순한 박스와 구가 테스트에 충분해야합니다.
public class BulletTest implements ApplicationListener {
    ...
    btCollisionShape groundShape;
    btCollisionShape ballShape;

    @Override
    public void create () {
        Bullet.init();
        ...
        ballShape = new btSphereShape(0.5f);
        groundShape = new btBoxShape(new Vector3(2.5f, 0.5f, 2.5f));
    }
    ...
}
btCollisionShape is the base class of every shape. For the ball we create a btSphereShape, which takes the radius as argument. The diameter of the ball is 1 unit, thus the radius is 0.5f. For the ground we create a btBoxShape, which takes the half extents as arguments. Since the ground is 5 units wide, 1 unit in height and has a depth of 5 units, we need to provide half of those values. This is done using a Vector3.
btCollisionShape 는 모든 도형의 기본 클래스입니다. 공의 경우 반경을 인수로 사용하는 btSphereShape 만듭니다. 볼의 지름은 1 단위이므로 반경은 0.5f 입니다. 땅을 위해서 우리는 btBoxShape 만듭니다. btBoxShape 는 절반 범위를 인수로 취합니다. 지상은 너비가 5 단위이고 높이가 1 단위이고 깊이가 5 단위이므로이 값의 절반을 제공해야합니다. 이 작업은 Vector3 사용하여 수행됩니다.
Note that Vector3 is a LibGDX class. Bullet's equivalent is btVector3 (which is also available in the wrapper). Where possible, the wrapper will bridge between LibGDX's math classes and the Bullet math classes. It will even do some optimizations for you when doing so (more on this later).
Vector3 는 LibGDX 클래스입니다. 글 머리 기호의 해당 항목은 btVector3 (래퍼에서도 사용 가능)입니다. 가능하다면 래퍼는 LibGDX의 수학 수업과 총알 수학 수업을 연결합니다. 그렇게 할 때 (심지어 나중에 더 많이) 당신을 위해 최적화를 할 것입니다.
A collision shape isn't enough to do collision detection. We will need to inform Bullet about the location (and rotation) of each shape. This is done using a collision object:
충돌 셰이프로는 충돌 감지를 수행하기에 충분하지 않습니다. Bullet에게 각 도형의 위치 (및 회전)에 대해 알릴 필요가 있습니다. 이는 충돌 객체를 사용하여 수행됩니다.
public class BulletTest implements ApplicationListener {
    ...
    btCollisionObject groundObject;
    btCollisionObject ballObject;

    @Override
    public void create () {
        ...
        groundObject = new btCollisionObject();
        groundObject.setCollisionShape(groundShape);
        groundObject.setWorldTransform(ground.transform);

        ballObject = new btCollisionObject();
        ballObject.setCollisionShape(ballShape);
        ballObject.setWorldTransform(ball.transform);
    }

    @Override
    public void render () {
        ...
        if (!collision) {
            ball.transform.translate(0f, -delta, 0f);
            ballObject.setWorldTransform(ball.transform);

            collision = checkCollision();
        }
        ...
    }
    ...
}
As you can see, a collision object is simply the combination of a collision shape and its transform. The transform in this case is its position and rotation. Just like we did with Vector3 for the box shape, we can set the transform using the transform member of the ModelInstance. The wrapper translates this Matrix4 for us to bullet's equivalent btTransform. While this is easy to work with, you should keep in mind that the transform -as far as bullet is concerned- only contains a position and rotation. Any other transformation, like for example scaling, is not supported. In practice this means that you should never apply scaling directly to objects when using the bullet wrapper. There are other ways to scale objects, but in general I would recommend to try to avoid scaling.
Now we've got the two objects and we want to detect if they collide. Before we can start the actual collision detection we need a few helper classes.
보시다시피, 충돌 객체는 단순히 충돌 모양과 그 변형의 조합입니다. 이 경우 변환은 위치와 회전입니다. 상자 모양에 대해 Vector3 에서했던 것처럼 ModelInstance 의 transform 멤버를 사용하여 transform 설정할 수 있습니다. 래퍼는이 Matrix4 를 총알의 btTransform 합니다. 이 작업은 쉬운 일이지만, 총알에 관한 한 변환은 위치와 회전 만 포함한다는 점을 명심해야합니다. 예를 들어 비율 조정과 같은 다른 변환은 지원되지 않습니다. 실제로 이것은 총알 래퍼를 사용할 때 객체에 직접 스케일을 적용해서는 안된다는 것을 의미합니다. 오브젝트를 스케일하는 다른 방법이 있지만, 일반적으로 스케일링을 피하려고 시도하는 것이 좋습니다.
이제 우리는 두 객체를 얻었고 충돌이 일어나는지 탐지하려고합니다. 실제 충돌 탐지를 시작하기 전에 몇 가지 도우미 클래스가 필요합니다.
public class BulletTest implements ApplicationListener {
    ...
    btCollisionConfiguration collisionConfig;
    btDispatcher dispatcher;

    @Override
    public void create () {
        ...
        collisionConfig = new btDefaultCollisionConfiguration();
        dispatcher = new btCollisionDispatcher(collisionConfig);
    }
    ...
}
We will look at the importance of these objects later, for now just make sure to construct them in the create method.
By now, you probably also noticed that until now all bullet classes start with the prefix "bt". While that's not always the true, it is most in cases.
나중에 이러한 객체의 중요성을 살펴볼 것입니다. 이제는 create 메소드에서 객체를 구성해야합니다.
지금까지 여러분은 아마도 모든 글 머리 기호 클래스가 접두어 "bt"로 시작한다는 것을 알았을 것입니다. 그것이 항상 사실은 아니지만, 대부분의 경우에 해당됩니다.
Every time you construct a bullet class in java, the wrapper will also construct the same class in the native (C++) library. But while in java the garbage collector takes care of memory management and will free an object when you don't use it anymore, in C++ you're responsible for freeing the memory yourself. You're probably already familiar with this cconcept, because the same goes for a texture, model, model batch, shader etc. Because of this, you have to manually dispose the object when you no longer need it.
자바에서 글 머리 기호 클래스를 생성 할 때마다 래퍼는 네이티브 (C ++) 라이브러리에서도 동일한 클래스를 생성합니다. 그러나 Java에서 가비지 컬렉터가 메모리 관리를 담당하고 더 이상 사용하지 않을 때 객체를 해제합니다. C ++에서는 메모리를 직접 해제해야합니다. 텍스처, 모델, 모델 일괄 처리, 셰이더 (shader) 등등 때문에이 개념에 이미 익숙 할 것입니다.이 때문에 더 이상 필요없는 객체를 수동으로 처리해야합니다.
    @Override
    public void dispose () {
        groundObject.dispose();
        groundShape.dispose();

        ballObject.dispose();
        ballShape.dispose();

        dispatcher.dispose();
        collisionConfig.dispose();

        modelBatch.dispose();
        model.dispose();
    }
We already disposed the model batch and model in the dispose method. Now, we've also disposed the collision shapes, collision objects and the helper classes dispatcher and collisionConfig which we'll look at soon.
Now we can start implementing the checkCollision method. Basically what we want is to check if the sphere collides with the box. Bullet has an algorithm for just that, called btSphereBoxCollisionAlgorithm.
우리는 이미 모델 배치와 모델을 dispose 메소드에 배치했습니다. 이제 우리는 충돌 모양, 콜리 전 오브젝트 및 헬퍼 클래스 dispatcher 와 collisionConfig 를 배치했습니다. 곧 살펴 보겠습니다.
이제 checkCollision 메소드를 구현할 수 있습니다. 기본적으로 우리가 원하는 것은 구가 상자와 충돌하는지 확인하는 것입니다. 불릿에는 btSphereBoxCollisionAlgorithm 이라는 알고리즘 만 있습니다.
    boolean checkCollision() {
        CollisionObjectWrapper co0 = new CollisionObjectWrapper(ballObject);
        CollisionObjectWrapper co1 = new CollisionObjectWrapper(groundObject);

        btCollisionAlgorithmConstructionInfo ci = new btCollisionAlgorithmConstructionInfo();
        ci.setDispatcher1(dispatcher);
        btCollisionAlgorithm algorithm = new btSphereBoxCollisionAlgorithm(null, ci, co0.wrapper, co1.wrapper, false);

        btDispatcherInfo info = new btDispatcherInfo();
        btManifoldResult result = new btManifoldResult(co0.wrapper, co1.wrapper);

        algorithm.processCollision(co0.wrapper, co1.wrapper, info, result);

        boolean r = result.getPersistentManifold().getNumContacts() > 0;

        result.dispose();
        info.dispose();
        algorithm.dispose();
        ci.dispose();
        co1.dispose();
        co0.dispose();

        return r;
    }
View full source code data-on Github
The first thing we do here is create a CollisionObjectWrapper for each object. Note that this class doesn't start with the prefix "bt", which is because it is a class specific to the libgdx bullet wrapper (it wraps a btCollisionObjectWrapper object, which can be accessed through the wrapper member).
여기서 가장 먼저 할 일은 각 객체에 대한 CollisionObjectWrapper 를 만드는 것입니다. 이 클래스는 접두사 "bt"로 시작하지 않습니다. libgdx bullet 래퍼에만 해당되는 클래스이므로 ( wrapper 멤버를 통해 액세스 할 수있는 btCollisionObjectWrapper 객체를 래핑합니다).
Next we construct a btCollisionAlgorithmConstructionInfo instance, which is used to specify information about the collision algorithm we want to create. We'll keep things default and because it needs a btDispatcher we just feed it the dispatcher that we created earlier.
다음으로 생성하려는 충돌 알고리즘에 대한 정보를 지정하는 데 사용되는 btCollisionAlgorithmConstructionInfo 인스턴스를 생성합니다. btDispatcher 가 필요하기 때문에 우리는 기본값을 유지할 것이며, 우리는 이전에 생성 한 dispatcher 를 피드로 사용합니다.
After that we construct a btSphereBoxCollisionAlgorithm, which needs the objects that we just created as arguments for the constructor. This is the algorithm that we'll be using to check if the sphere collides with the box. To execute this algorithm we need an additional btDispatcherInfo (which provides additional information about the desired algorithm) and a btManifoldResult (which will receive the result). Note that the algorithm is an instance of btCollisionAlgorithm which is the super class of all collision algorithms.
그런 다음 btSphereBoxCollisionAlgorithm 생성합니다. 생성자에 대한 인수로 방금 생성 한 객체가 필요합니다. 구가 상자와 충돌하는지 확인하기 위해 사용할 알고리즘입니다. 이 알고리즘을 실행하려면 btDispatcherInfo (원하는 알고리즘에 대한 추가 정보를 제공)와 btManifoldResult (결과를 btManifoldResult )가 필요합니다. 알고리즘은 모든 충돌 알고리즘의 수퍼 클래스 인 btCollisionAlgorithm 의 인스턴스입니다.
Now we can actually execute the algorithm by calling the processCollision method of the algorithm. This will store the result (the contact points) in the btManifoldResult we've create earlier. If the number of contact points is more than zero, then there's a collision.
Finally, like we've seen earlier, it is important to dispose every bullet class that we've constructor.
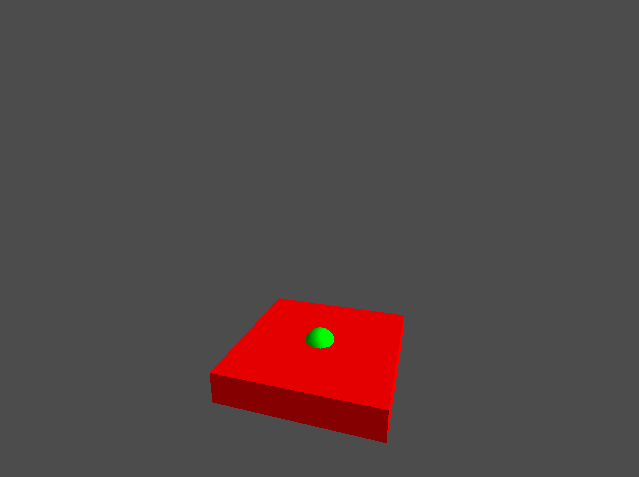
If you run this, you'll see that it does exactly what we wanted. The ball will stop moving when it hits the ground.
이제 알고리즘의 processCollision 메소드를 호출하여 실제로 알고리즘을 실행할 수 있습니다. 그러면 이전에 작성한 btManifoldResult 에 결과 (접촉점)가 저장됩니다. 접촉점 수가 0 이상이면 충돌이 발생합니다.
마지막으로, 이전에 보았 듯이 생성자가 만든 모든 글 머리 기호 클래스를 처리하는 것이 중요합니다.
이것을 실행하면 정확히 우리가 원하는 것을 볼 수 있습니다. 공은 땅에 닿으면 움직이지 않을 것입니다.
If this seems a bit overwhelming, don't worry, it will get clear later data-on. For now make sure that you understand the basics of what we just did: We've created two collision shapes. Then created two collision objects containing a shape, position and rotation. To check if the two objects collide, we've create a collision algorithm which is specifically designed for detecting sphere-box collisions. The result of this collision detection is called a manifold, which contains the contact points (if any) of the collision. These contact points contain information over the collision, for example the distance (penetration) and direction of the collision.
이것이 약간 압도적 인 것 같아도 걱정하지 마십시오. 나중에 분명해질 것입니다. 지금 당장의 기본 사항을 이해했는지 확인하십시오. 우리는 두 가지 충돌 셰이프를 만들었습니다. 그런 다음 모양, 위치 및 회전을 포함하는 두 개의 충돌 객체를 작성했습니다. 두 개체가 충돌하는지 확인하기 위해 sphere-box 충돌을 감지하도록 특별히 설계된 충돌 알고리즘을 생성했습니다. 이 충돌 감지의 결과는 충돌의 접촉점 (있는 경우)을 포함하는 매니 폴드라고합니다. 이러한 접점에는 충돌에 대한 정보 (예 : 충돌의 거리 및 침투 방향)가 포함됩니다.
A peek behind the scenes
Before we continue, I think this is a good moment to see what is actually going data-on behind the scenes. Let's have a quick look at the following line:
boolean r = result.getPersistentManifold().getNumContacts() > 0;
What this basically does is exactly the same as:
btPersistentManifold manifold = result.getPersistentManifold();
int numContacts = manifold.getNumContacts();
boolean r = (numContacts > 0);
The call to result.getPersistentManifold() returns a btPersistentManifold. Now let's have a small peek at what the wrapper has to do behind the scenes for this:
  public btPersistentManifold getPersistentManifold() {
    long cPtr = CollisionJNI.btManifoldResult_getPersistentManifold__SWIG_0(swigCPtr, this);
    return (cPtr == 0) ? null : new btPersistentManifold(cPtr, false);
  }
Don't worry, you don't need to understand exactly what's going on here. But I think that it is good practice that you have some global understanding of the impact of the code that you're writing. In the first line the wrapper executes the method (getPersistentManifold) on the native (C++) object. The result of this method is a long value. This value is the "pointer" to the btPersistentManifold object in the C++ library. A pointer is simply the location in memory where the object resides. This long value can later be used to execute methods on the btPersistentManifold object.
걱정하지 마세요. 여기서 무슨 일이 일어나는지 정확히 이해할 필요가 없습니다. 그러나 필자가 작성한 코드의 영향 에 대해 전 세계적으로 이해하고있는 것이 바람직하다고 생각합니다. 첫 번째 행에서 랩퍼는 원시 (C ++) 오브젝트에서 메소드 ( getPersistentManifold )를 실행합니다. 이 메서드의 결과는 long 값입니다. 이 값은 C ++ 라이브러리의 btPersistentManifold 객체에 대한 "포인터"입니다. 포인터는 단순히 개체가 상주하는 메모리상의 위치입니다. 이 long 값은 나중에 btPersistentManifold 객체에서 메소드를 실행하는 데 사용될 수 있습니다.
On the next line the wrapper creates the java equivalent of the btPersistentManifold object, so you can easily use it. All java bullet classes contain the pointer to the equivalent C++ class. You can access this long value using the getCPointer() method that every java bullet class has.
다음 줄에서 래퍼는 btPersistentManifold 객체와 비슷한 Java를 생성하므로 쉽게 사용할 수 있습니다. 모든 Java Bullet 클래스에는 동등한 C ++ 클래스에 대한 포인터가 들어 있습니다. 모든 Java Bullet 클래스에있는 getCPointer() 메소드를 사용하여이 long 값에 액세스 할 수 있습니다.
Note that because we didn't explicitly created the btPersistentManifold object (or in other words: we don't own it), we also don't have to dispose the object. However, it doesn't harm if you do dispose it, the wrapper knows that we don't own it and will therefor not destroy the backing C++ object. You can query the ownership of each java bullet class, using the hasOwnership() method.
우리가 명시 적으로 btPersistentManifold 객체를 만들지 않았기 때문에 (즉, 우리가 소유하지 않았기 때문에) 객체를 dispose 필요가 없습니다. 그러나 dispose 해도 해가되지는 않습니다. 래퍼는 자신이 소유하고 있지 않다는 것을 알고 있으므로 배킹 C ++ 객체를 파괴하지 않습니다. hasOwnership() 메서드를 사용하여 각 Java Bullet 클래스의 소유권을 쿼리 할 수 있습니다.
Using the collision dispatcher
Back to our collision detection test. As you probably can imagine there are many collision algorithms, for each possible pair of collision objects (shapes) there's a collision algorithm. Manually creating a collision algorithm for each collision pair will get messy really fast. Luckily Bullet can create a collision algorithm for each pair of objects for us. This is done by the dispatcher which we've created earlier.
충돌 감지 테스트로 돌아갑니다. 충돌 알고리즘이 여러 개 있다고 상상할 수 있듯이 가능한 각 충돌 오브젝트 쌍 (모양)마다 충돌 알고리즘이 있습니다. 각 충돌 쌍에 대한 충돌 알고리즘을 수동으로 생성하면 정말 지저분해질 수 있습니다. 운 좋게도 Bullet은 우리를 위해 객체 쌍마다 충돌 알고리즘을 만들 수 있습니다. 이것은 이전에 작성한 디스패처에 의해 수행됩니다.
    @Override
    public void render () {
        ...
            collision = checkCollision(ballObject, groundObject);
        ...
    }

    boolean checkCollision(btCollisionObject obj0, btCollisionObject obj1) {
        CollisionObjectWrapper co0 = new CollisionObjectWrapper(obj0);
        CollisionObjectWrapper co1 = new CollisionObjectWrapper(obj1);

        btCollisionAlgorithm algorithm = dispatcher.findAlgorithm(co0.wrapper, co1.wrapper);

        btDispatcherInfo info = new btDispatcherInfo();
        btManifoldResult result = new btManifoldResult(co0.wrapper, co1.wrapper);

        algorithm.processCollision(co0.wrapper, co1.wrapper, info, result);

        boolean r = result.getPersistentManifold().getNumContacts() > 0;

        dispatcher.freeCollisionAlgorithm(algorithm.getCPointer());
        result.dispose();
        info.dispose();
        co1.dispose();
        co0.dispose();

        return r;
    }
View full source code data-on Github
I've modified the checkCollision signature a bit so that it can be used for any pair of collision objects. Instead of manually creating a sphere-box collision algorithm, we now ask the dispatcher to find the correct algorithm for us using the dispatcher.findAlgorithm method. The rest of the method is pretty much the same as before. Except for data-one thing: we don't own the algorithm anymore, so we don't have to dispose it anymore. Instead we need to inform the dispatcher that we're done with the algorithm so that it can be reused (pooled) for other collision detection. For this the dispatcher needs to now the location in memory of the algorithm. As we've seen earlier, we can use the getCPointer method to get this location.
checkCollision 시그니처를 약간 수정하여 충돌 객체 쌍에 사용할 수 있도록했습니다. sphere-box 충돌 알고리즘을 수동으로 생성하는 대신, dispatcher.findAlgorithm 메소드를 사용하여 dispatcher.findAlgorithm 에게 올바른 알고리즘을 찾도록 요청합니다. 나머지 메소드는 이전과 거의 같습니다. 한 가지를 제외하면 더 이상 알고리즘을 소유하지 않으므로 더 이상 처리 할 필요가 없습니다. 대신 우리는 다른 충돌 탐지를 위해 재사용 (풀링) 될 수 있도록 알고리즘이 완료되었다는 것을 운영자에게 알릴 필요가 있습니다. 이를 위해 디스패처는 이제 알고리즘을 기억하는 위치에 있어야합니다. 이전에 보았 듯이 getCPointer 메서드를 사용하여이 위치를 가져올 수 있습니다.
Add more objects
Well that's nice, we now have a generic method to check if two objects intersect. So let's add some additional objects that we can compare against each other. And while we're at it, we might as well make the code a bit cleaner for using multiple objects. Therefor, first add the collision object to the model instance by extending the ModelInstance class:
이제 두 개의 객체가 교차하는지 확인하는 일반적인 방법이 있습니다. 서로 비교할 수있는 몇 가지 추가 객체를 추가합시다. 그리고 그 동안 우리는 여러 객체를 사용하기 위해 코드를 조금 더 깨끗하게 만들 수 있습니다. 따라서 먼저 ModelInstance 클래스를 확장하여 충돌 인스턴스를 모델 인스턴스에 추가합니다.
public class BulletTest implements ApplicationListener {
    static class GameObject extends ModelInstance implements Disposable {
        public final btCollisionObject body;
        public boolean moving;
        public GameObject(Model model, String node, btCollisionShape shape) {
            super(model, node);
            body = new btCollisionObject();
            body.setCollisionShape(shape);
        }

        @Override
        public void dispose () {
            body.dispose();
        }
    }
    ...
}
By having a btCollisionObject body member (which basically is the collision shape and transformation), it is easier to maintain our game objects. We will use the moving member to decide if the object is on the ground or not.
Another nice way to make the code a bit cleaner is to use "factory" classes:
btCollisionObject body 구성원 (기본적으로 충돌 모양 및 변형)을 사용하면 게임 개체를 유지 관리하기가 더 쉽습니다. moving 물체를 사용하여 물체가 바닥에 있는지 없는지를 결정합니다.
코드를 좀 더 깔끔하게 만드는 또 다른 좋은 방법은 "factory"클래스를 사용하는 것입니다.
public class BulletTest implements ApplicationListener {
    static class GameObject extends ModelInstance implements Disposable {
        ...
        static class Constructor implements Disposable {
            public final Model model;
            public final String node;
            public final btCollisionShape shape;
            public Constructor(Model model, String node, btCollisionShape shape) {
                this.model = model;
                this.node = node;
                this.shape = shape;
            }

            public GameObject construct() {
                return new GameObject(model, node, shape);
            }

            @Override
            public void dispose () {
                shape.dispose();
            }
        }
    }
}
Now we can have a GameObject.Constructor for each different shape and call the construct method on it to create a GameObject. If you combine this with a map, you get a really convenient method to construct your game objects:
이제 우리는 각기 다른 도형에 대해 GameObject.Constructor 를 가질 수 있고 GameObject.Constructor 를 생성하기 위해 그 위에 construct 메소드를 호출 할 수 있습니다. 이것을지도와 결합하면 게임 객체를 구성하는 데 매우 편리한 방법을 얻을 수 있습니다.
public class BulletTest implements ApplicationListener {
    ...
    Array<GameObject> instances;
    ArrayMap<String, GameObject.Constructor> constructors;

    @Override
    public void create () {
        ...
        camController = new CameraInputController(cam);
        Gdx.input.setInputProcessor(camController);

        ModelBuilder mb = new ModelBuilder();
        mb.begin();
        mb.node().id = "ground";
        mb.part("ground", GL20.GL_TRIANGLES, Usage.Position | Usage.Normal, new Material(ColorAttribute.createDiffuse(Color.RED)))
            .box(5f, 1f, 5f);
        mb.node().id = "sphere";
        mb.part("sphere", GL20.GL_TRIANGLES, Usage.Position | Usage.Normal, new Material(ColorAttribute.createDiffuse(Color.GREEN)))
            .sphere(1f, 1f, 1f, 10, 10);
        mb.node().id = "box";
        mb.part("box", GL20.GL_TRIANGLES, Usage.Position | Usage.Normal, new Material(ColorAttribute.createDiffuse(Color.BLUE)))
            .box(1f, 1f, 1f);
        mb.node().id = "cone";
        mb.part("cone", GL20.GL_TRIANGLES, Usage.Position | Usage.Normal, new Material(ColorAttribute.createDiffuse(Color.YELLOW)))
            .cone(1f, 2f, 1f, 10);
        mb.node().id = "capsule";
        mb.part("capsule", GL20.GL_TRIANGLES, Usage.Position | Usage.Normal, new Material(ColorAttribute.createDiffuse(Color.CYAN)))
            .capsule(0.5f, 2f, 10);
        mb.node().id = "cylinder";
        mb.part("cylinder", GL20.GL_TRIANGLES, Usage.Position | Usage.Normal, new Material(ColorAttribute.createDiffuse(Color.MAGENTA)))
            .cylinder(1f, 2f, 1f, 10);
        model = mb.end();

        constructors = new ArrayMap<String, GameObject.Constructor>(String.class, GameObject.Constructor.class);
        constructors.put("ground", new GameObject.Constructor(model, "ground", new btBoxShape(new Vector3(2.5f, 0.5f, 2.5f))));
        constructors.put("sphere", new GameObject.Constructor(model, "sphere", new btSphereShape(0.5f)));
        constructors.put("box", new GameObject.Constructor(model, "box", new btBoxShape(new Vector3(0.5f, 0.5f, 0.5f))));
        constructors.put("cone", new GameObject.Constructor(model, "cone", new btConeShape(0.5f, 2f)));
        constructors.put("capsule", new GameObject.Constructor(model, "capsule", new btCapsuleShape(.5f, 1f)));
        constructors.put("cylinder", new GameObject.Constructor(model, "cylinder", new btCylinderShape(new Vector3(.5f, 1f, .5f))));

        instances = new Array<GameObject>();
        instances.add(constructors.get("ground").construct());

        collisionConfig = new btDefaultCollisionConfiguration();
        dispatcher = new btCollisionDispatcher(collisionConfig);
    }
    ...
    @Override
    public void dispose () {
        for (GameObject obj : instances)
            obj.dispose();
        instances.clear();

        for (GameObject.Constructor ctor : constructors.values())
            ctor.dispose();
        constructors.clear();

        dispatcher.dispose();
        collisionConfig.dispose();

        modelBatch.dispose();
        model.dispose();
    }
}
As you can see I've removed the previous code to construct the collision shapes and objects and replaced it to using the GameObject.Constructor class. The instances array is now an array of GameObjectinstances. We use the ModelBuilder to create the nodes for each shape. Next we create a GameObject.Constructor for each shape, including the btCollisionShape for each constructor. We've given each constructor a descriptive name in the map, so that you now can create a game object like this: constructors.get(name).construct(). Of course we need to dispose each collision object and shape just like before, therefor the dispose method is modified a bit as well.
Now let's modify the render method to use the GameObject and make it add a new game object every second or so:
보시다시피 이전 코드를 제거하여 충돌 셰이프 및 개체를 만들고이를 GameObject.Constructor 클래스를 사용하여 대체했습니다. 인스턴스 배열은 이제 GameObject 인스턴스의 배열입니다. ModelBuilder 를 사용하여 각 도형의 노드를 만듭니다. 다음으로 각 생성자에 대한 btCollisionShape 를 포함하여 각 셰이프에 대한 GameObject.Constructor 를 만듭니다. 우리는 각 생성자에게 맵에 설명적인 이름을 부여 했으므로 이제 constructors.get(name).construct() 와 같은 게임 객체를 만들 수 있습니다. 물론 이전과 같이 각 충돌 객체와 모양을 처리해야하므로 dispose 메서드가 약간 수정되었습니다.
이제 GameObject 를 사용하도록 render 메소드를 수정하고 매 초마다 새로운 게임 객체를 추가하도록합시다.
public class BulletTest implements ApplicationListener {
    ...
    float spawnTimer;
    ...
    @Override
    public void render () {
        final float delta = Math.min(1f/30f, Gdx.graphics.getDeltaTime());

        for (GameObject obj : instances) {
            if (obj.moving) {
                obj.transform.trn(0f, -delta, 0f);
                obj.body.setWorldTransform(obj.transform);
                if (checkCollision(obj.body, instances.get(0).body))
                    obj.moving = false;
            }
        }

        if ((spawnTimer -= delta) < 0) {
            spawn();
            spawnTimer = 1.5f;
        }
        ...
    }

    public void spawn() {
        GameObject obj = constructors.values[1+MathUtils.random(constructors.size-2)].construct();
        obj.moving = true;
        obj.transform.setFromEulerAngles(MathUtils.random(360f), MathUtils.random(360f), MathUtils.random(360f));
        obj.transform.trn(MathUtils.random(-2.5f, 2.5f), 9f, MathUtils.random(-2.5f, 2.5f));
        obj.body.setWorldTransform(obj.transform);
        instances.add(obj);
    }
    ...
}
View full source code data-on Github
For each GameObject we check if it is moving and if so move it downwards with data-one unit per second. Then we check if it collides with the first game object (which we know is the ground) and if so, we stop moving the object. Next we use a member spawnTimer to call the spawn() method every 1.5seconds.
각 GameObject 대해 우리는 움직이는 지 확인하고 만약 그렇다면 초 당 1 유닛으로 움직입니다. 그런 다음 첫 번째 게임 개체 (우리가 알고있는 땅)와 충돌하는지 확인한 다음 개체 이동을 중지합니다. 다음으로 우리는 멤버 spawnTimer 를 사용하여 매 1.5 초마다 spawn() 메서드를 호출합니다.
In the spawn method we randomly construct a new GameObject (except for the floor) and set it to a random location above the ground. We also rotate it randomly. And because the object is rotated now we use the trn method instead of the translate method to translate the object. The trn method will translate the object regardless rotation, so the object will always move towards the location we specify.
스폰 방법에서 우리는 무작위로 새로운 GameObject (바닥을 제외하고)를 만들고 그것을 땅 위에 임의의 위치로 설정합니다. 또한 무작위로 회전시킵니다. 그리고 객체가 회전 되었기 때문에 translate 메소드 대신 trn 메소드를 사용하여 객체를 변환합니다. trn 메서드는 회전에 관계없이 객체를 변환하므로 객체는 항상 지정한 위치로 이동합니다.
I'm not going into the details of these changes, because they aren't Bullet related and should be straight forward. All we did was make our code a bit cleaner for multiple game objects.
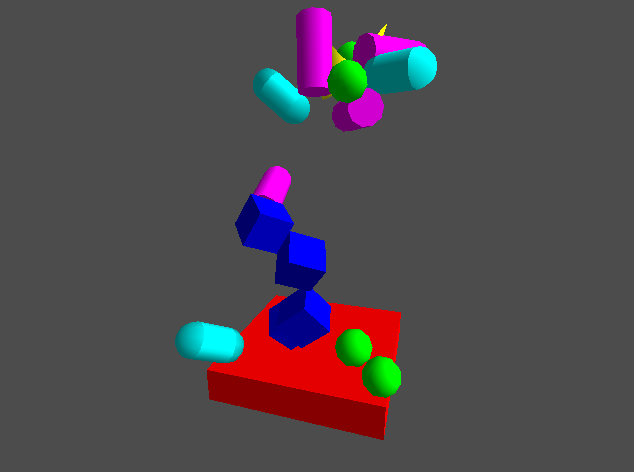
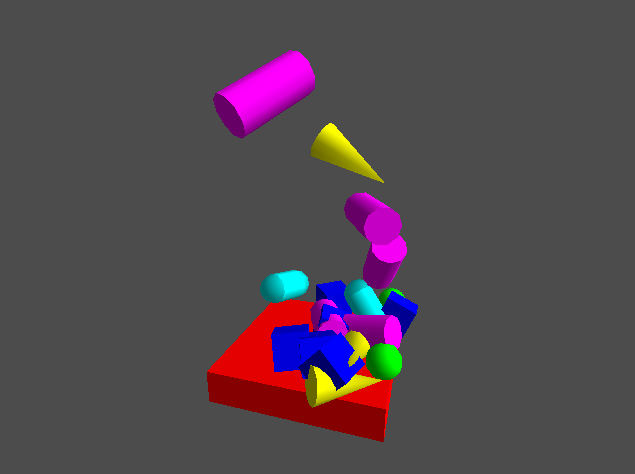
If you run this, you'll see various random object falling data-onto the ground:
나는 Bullet과 관련이 없으며 앞으로 나아갈 수 있어야하기 때문에 이러한 변경에 대한 자세한 내용을 다루지 않을 것입니다. 우리가 한 일은 우리의 코드를 여러 게임 객체에 대해 좀 더 깔끔하게 만드는 것입니다.
이것을 실행하면 다양한 임의의 객체가 바닥에 떨어지는 것을 볼 수 있습니다.
Using a ContactListener
All of this is nice if you want to check if two objects collide. But if we also want to check if the objects collide with each other and the number of objects grows, this will get messy and slow. Instead of checking each possible collision pair, it's much more convenient to get notified when a collision occurs. Luckily Bullet offers callback methods which will be called data-on certain collision events.
두 객체가 충돌하는지 확인하려면이 모든 것이 좋습니다. 그러나 객체가 서로 충돌하고 객체의 수가 증가하는지 여부를 확인하기를 원하면 지저분 해지고 느려질 것입니다. 가능한 각 충돌 쌍을 검사하는 대신 충돌이 발생할 때 알림을받는 것이 훨씬 편리합니다. Luckily Bullet은 특정 콜리 전 이벤트에서 콜백 메소드를 호출합니다.
public class BulletTest implements ApplicationListener {
    class MyContactListener extends ContactListener {
        @Override
        public boolean onContactAdded (btManifoldPoint cp, btCollisionObjectWrapper colObj0Wrap, int partId0, int index0,
            btCollisionObjectWrapper colObj1Wrap, int partId1, int index1) {
            instances.get(colObj0Wrap.getCollisionObject().getUserValue()).moving = false;
            instances.get(colObj1Wrap.getCollisionObject().getUserValue()).moving = false;
            return true;
        }
    }
    ...
    MyContactListener contactListener;

    @Override
    public void create () {
        ...
        contactListener = new MyContactListener();
    }

    @Override
    public void render () {
        ...
        for (GameObject obj : instances) {
            if (obj.moving) {
                obj.transform.trn(0f, -delta, 0f);
                obj.body.setWorldTransform(obj.transform);
                checkCollision(obj.body, instances.get(0).body);
            }
        }
        ...
    }
    public void spawn() {
        ...
        obj.body.setUserValue(instances.size);
        obj.body.setCollisionFlags(obj.body.getCollisionFlags() | btCollisionObject.CollisionFlags.CF_CUSTOM_MATERIAL_CALLBACK);
        ...
    }
    ...
    @Override
    public void dispose () {
        ...
        contactListener.dispose();
        ...
    }
View full source code data-on Github
Here we create a ContactListener, which is not a Bullet class, but a class specifically created for the wrapper. Bullet doesn't use object oriented callbacks for collision events, all callbacks are global methods (a bit comparable static java methods). Because it's not possible in Java to use global callback methods, the wrapper adds the ContactListener class to take care of that. This is also the reason that we don't have to inform bullet to use our ContactListener, the wrapper takes care of that when you construct the ContactListener.
여기서 우리는 Bullet 클래스가 아닌 ContactListener 만들었지 만 래퍼를 위해 특별히 생성 된 클래스입니다. 총알은 충돌 이벤트에 객체 지향 콜백을 사용하지 않으며, 모든 콜백은 전역 메소드 (비트와 비교 가능한 정적 자바 메소드)입니다. Java에서는 글로벌 콜백 메소드를 사용할 수 없으므로 래퍼는 ContactListener 클래스를 추가하여이를 처리합니다. 또한 ContactListener 를 사용하기 위해 bullet에 알릴 필요가없는 이유이기 때문에 ContactListener 를 구성 할 때 래퍼가이를 처리합니다.
The onContactAdded method is called whenever a contact point is added to a manifold. As we've seen earlier, as soon as a manifold has data-one or more contact points, there's a collision. So basically this method is called when a collision occurs between two objects.
onContactAdded 메서드는 접점이 매니 폴드에 추가 될 때마다 호출됩니다. 앞서 살펴본 것처럼 매니 폴드에 하나 이상의 접점이 있으면 충돌이 발생합니다. 그래서 기본적으로이 메소드는 두 객체간에 충돌이 발생할 때 호출됩니다.
Of course the Bullet library isn't aware of our GameObject class, so we need a way to get our GameObject using the data Bullet provides to us in the callback method. If you're familiar with box2d, you're probably also familiar with using a userData member for that. The Bullet wrapper also supports a userData member of the btCollisionObject which is practically the same. However, we'll use the setUserValue and getUserValue methods instead. This is an integer value which we set to the index of the GameObject in the instances array. So, using instances.get(colObj0Wrap.getCollisionObject().getUserValue()) we can get the corresponding GameObject.
물론 Bullet 라이브러리는 GameObject 클래스를 인식하지 못하므로 Bullet이 콜백 메소드에서 제공하는 데이터를 사용하여 GameObject 를 얻는 방법이 필요합니다. box2d에 익숙하다면 아마도 userData 멤버를 사용하는 것에 익숙 할 것입니다. Bullet 랩퍼는 실질적으로 동일한 btCollisionObject 의 userData 구성원도 지원합니다. 그러나 대신 setUserValue 및 getUserValue 메서드를 사용합니다. 이 값은 인스턴스 배열에서 GameObject 의 인덱스로 설정하는 정수 값입니다. 그래서, instances.get(colObj0Wrap.getCollisionObject().getUserValue()) 를 사용하여 해당 GameObject 얻을 수 있습니다.
In the spawn method we set this value, using the setUserValue method, to the index of the object in the instances array. And we also inform Bullet that we want to receive collision events for this object by adding the CF_CUSTOM_MATERIAL_CALLBACK flag. This flag is required for the onContactAdded method to be called.
스폰 메소드에서 우리는이 값을 setUserValue 메소드를 사용하여 인스턴스 배열에있는 객체의 인덱스에 설정합니다. 또한 Bullet에 CF_CUSTOM_MATERIAL_CALLBACK 플래그를 추가하여이 객체에 충돌 이벤트를 수신하도록 알려줍니다. 이 플래그는 onContactAdded 메소드를 호출하는 데 필요합니다.
In the render method we now don't have to set the moving flag anymore, so I removed that part and data-only call the checkCollision method. Like always the contactListener has to be disposed, so we've added a line to the dispose method.
If you run this, you'll see it does exactly the same as before, but now we use contact callback instead of polling each collision pair.
render 메서드에서 이제는 moving 플래그를 더 이상 설정할 필요가 checkCollision 부분을 제거하고 checkCollision 메서드 만 호출하면 checkCollision . 항상 그렇듯이 contactListener 를 삭제해야하므로 dispose 메서드에 줄을 추가했습니다.
이것을 실행하면 이전과 똑같은 것을 볼 수 있지만 이제는 각 충돌 쌍을 폴링하는 대신 접촉 콜백을 사용합니다.
Optimizing frequently called methods
Earlier we've seen that all wrapper classes are basically a pointer to the corresponding C++ object. This is how the wrapper can call the appropriate method data-on the C++ object when you call a method data-on a java object. But that's data-only a data-one-way street. How is it possible that the Bullet C++ code invokes a Java method? Well, for most classes it isn't. data-only for classes specifically designed to be extended the overridden methods will be called. This is to reduce the overhead of bridging from C++ to Java, so that no performance is lost when a method is not intended to be overridden. ContactListener is such a class which is intended to be overridden and there are quite a few other "callback" classes as well.
앞서 모든 래퍼 클래스는 기본적으로 해당 C ++ 객체에 대한 포인터임을 알았습니다. 이것은 래퍼가 Java 객체에서 메소드를 호출 할 때 C ++ 객체에서 적절한 메소드를 호출하는 방법입니다. 하지만 그건 단지 일방 통행 거리에 불과합니다. Bullet C ++ 코드가 Java 메소드를 호출하는 것이 어떻게 가능합니까? 음, 대부분의 수업에서는 그렇지 않습니다. 확장 할 수 있도록 특별히 설계된 클래스의 경우에만 재정의 된 메서드가 호출됩니다. 이는 C ++에서 Java 로의 브리징 오버 헤드를 줄이기 위해 메서드를 재정의하지 않을 때 성능이 손실되지 않도록하기위한 것입니다. ContactListener 는 오버라이드 (override) 될 수있는 클래스이며 다른 몇 가지 "콜백"클래스도 있습니다.
As we've seen earlier, the wrapper will create a java object for each C++ object as we need it. Creating objects when we don't need them is of course (and especially for games) something we want to avoid. Because of this, the wrapper lets you specify which objects you really need inside the ContactListenermethods. For this the ContactListener has multiple signatures of the same method which you can override. You can data-only override data-one of those, because the wrapper will data-only call data-one method for an event.
Looking at our ContactListener, we never use the btManifoldPoint. So if we use the signature which doesn't include that argument, then the wrapper doesn't have to create it:
이전에 보았 듯이 래퍼는 필요할 때마다 각 C ++ 객체에 대한 Java 객체를 만듭니다. 필요없는 객체를 만드는 것은 당연히 (그리고 특히 게임의 경우) 우리가 피하고 싶은 것입니다. 이 때문에 래퍼를 사용하면 ContactListener 메서드 내에서 실제로 필요한 개체를 지정할 수 있습니다. 이를 위해 ContactListener 에는 재정의 할 수있는 동일한 메서드의 여러 서명이 있습니다. 랩퍼는 이벤트에 대해 하나의 메소드 만 호출하기 때문에 이들 중 하나만 대체 할 수 있습니다.
ContactListener 보면 btManifoldPoint 사용하지 않습니다. 그래서 우리가 그 인수를 포함하지 않는 서명을 사용한다면, 래퍼는 그것을 생성 할 필요가 없다.
    class MyContactListener extends ContactListener {
        @Override
        public boolean onContactAdded (btCollisionObjectWrapper colObj0Wrap, int partId0, int index0,
            btCollisionObjectWrapper colObj1Wrap, int partId1, int index1) {
            instances.get(colObj0Wrap.getCollisionObject().getUserValue()).moving = false;
            instances.get(colObj1Wrap.getCollisionObject().getUserValue()).moving = false;
            return true;
        }
    }
Because a btCollisionObjectWrapper is frequently used in a callback, the wrapper takes special care of that. It uses a pool for those objects. But since we don't actually use the btCollisionObjectWrapper and only need the btCollisionObject that it wraps, we might as well use the method signature that provides a btCollisionObject instead.
btCollisionObjectWrapper 는 콜백에서 자주 사용되기 때문에 래퍼는이를 특별히 처리합니다. 이러한 객체에 대해 풀을 사용합니다. 그러나 실제로 btCollisionObjectWrapper 사용하지 않고 랩핑하는 btCollisionObject 만 필요하므로 btCollisionObject 를 대신 제공하는 메서드 시그니처를 사용할 수도 있습니다.
    class MyContactListener extends ContactListener {
        @Override
        public boolean onContactAdded (btCollisionObject colObj0, int partId0, int index0, btCollisionObject colObj1, int partId1,
            int index1) {
            instances.get(colObj0.getUserValue()).moving = false;
            instances.get(colObj1.getUserValue()).moving = false;
            return true;
        }
    }
Since a btCollisionObject is always created in Java, the wrapper will make sure to use that instance every time it needs to. For this it uses a long-map (with the C++ pointer as key). Of course there's a small overhead of looking up the correct btCollisionObject, but this allows you to extend btCollisionObject and make sure you will always have access to the extended class in the callbacks.
However, we only need the user value in the callback, this value is enough to locate the GameObject in the instances array. We don't need the wrapper to look-up the collision object using the long-map.
btCollisionObject 는 항상 Java로 작성되므로 랩퍼는 필요할 때마다 해당 인스턴스를 사용합니다.이를 위해이 (키와 C ++ 포인터) 긴 맵을 사용합니다. 물론이 올바른을 찾는 작은 오버 헤드입니다 btCollisionObject, 그러나 이것은 당신이 확장 할 수 있습니다 btCollisionObject당신은 항상 콜백에서 확장 한 클래스에 액세스 할 수 있는지 확인하십시오.
그러나, 우리는 콜백에서 사용자 값을 필요로,이 값은를 찾을 충분 GameObject인스턴스 배열. 우리는 룩업하는 충돌 객체를 오랫동안지도를 사용하여 래퍼가 필요하지 않습니다.
    class MyContactListener extends ContactListener {
        @Override
        public boolean onContactAdded (int userValue0, int partId0, int index0, int userValue1, int partId1, int index1) {
            instances.get(userValue0).moving = false;
            instances.get(userValue1).moving = false;
            return true;
        }
    }
View full source code data-on Github
The wrapper has the ability of providing us the userValue, and therefor completely eliminating the need to create an object at all. We've now created a callback method with data-only primitive arguments, which means that there will be no objects created or map look-ups for this method call.
래퍼는 우리가 제공하는 능력이있다 userValue, 및 그 완전히 모든 객체를 생성 할 필요가 없습니다합니다. 우리는 지금이 만든 어떤 물체 수 없습니다 또는이 메소드 호출 보면 업을 매핑하는 것을 의미 원시적 인수 콜백 방법을 만들었습니다.
Add a collision world
Now we receive an event when there's a collision, but we are still manually checking each object if it collides with the ground. And while the method we use to check for collision works pretty well, it is far from optimized. First of all, we are constructing and destroying quite some objects in the checkCollision method. And as we've just seen, it's best to prevent creating objects frequently. Otherwise the garbage collector might cause a hick-up every few seconds or so.
충돌이있을 때 이제 우리는 이벤트를받을 수 있지만 그것은 지상과 충돌하는 경우 우리는 여전히 수동으로 각 개체를 확인하고 있습니다. 우리는 충돌을 확인하는 데 사용하는 방법은 꽤 잘 작동하는 동안 최적화에서, 그것은 멀다. 우선, 우리가 건설하고있는 꽤 많은 개체를 파괴하고 checkCollision방법을. 그리고 우리는 그냥 자주 만드는 객체를 방지하는 것이 가장 좋습니다, 본 적이있다. 그렇지 않으면 가비지 컬렉터는 시골뜨기 업마다 몇 초 정도가 발생할 수 있습니다.
But even besides the fact that we construct many objects, there's another issue. We're using a specialized collision algorithm every time. And as you might remember from the previous tutorial, specialized collision algorithms can be relatively expensive. Ideally we'd first check if the two objects are near each other, for example using a bounding box or bounding sphere. And data-only if they are near each other, we'd use the more accurate specialized collision algorithm.
그러나 심지어 우리는 많은 개체를 구성 사실 외에, 또 다른 문제가있다. 우리는 전문적인 충돌 알고리즘 때마다 사용하고 있습니다. 이전 튜토리얼에서 기억 하듯이 그리고, 전문 충돌 알고리즘은 상대적으로 비용이 많이들 수 있습니다. 두 객체가 서로 가까이있는 경우 이상적으로 우리는 먼저 경계 상자를 사용하거나 영역을 경계 예를 들어, 확인 것입니다. 그리고 그들은 서로 가까이있는 경우에만, 우리는보다 정확한 전문 충돌 알고리즘을 사용하십시오.
Using such two phase collision detection has many benefits. The first phase, where we find collision objects that are near each other, is called the broad phase. Then the second phase, where a more accurate specialized collision algorithm is used, is called the near phase. Up until now we've only looked at the near phase. In practice the collision dispatcher is the class we've used for the near phase.
이러한 두 단계 충돌 감지를 사용하면 많은 이점이 있습니다. 우리가 서로 가까이 충돌 객체를 찾아 첫 번째 단계는, 호출되는 다양한 단계 . 그리고보다 정확한 전문 충돌 알고리즘을 사용하는 두 번째 단계는, 호출됩니다 근처 단계 . 지금까지 우리는 가까운 단계 살펴 보았다. 연습에서 충돌 디스패처는 우리가 가까운 단계에 사용했던 클래스입니다.
As you can imagine, in a common scenario the broad phase is called for all collision objects, while the near phase is only called for a few objects. It's therefor crucial that the broad phase is highly optimized. Bullet does this by caching the collision information, so it doesn't have to recalculate it every time. There are several implementations you can choose from, but in practice this is done in the form a tree. I'll not go into detail about this, but if you want to know more about it, you can search for "axis aligned bounding box tree" or in short "AABB tree".
당신이 상상할 수 있듯이 가까운 단계가 몇 개체에 대한라고하면서, 일반적인 시나리오에서 광범위한 단계는 모든 충돌 객체에 대해 호출됩니다. 그것은 광범위한 단계는 고도로 최적화되어 그에 중요합니다. 총알은 충돌 정보를 캐싱하여이 작업을 수행, 그래서 그 때마다 다시 계산 할 필요가 없습니다. 이 당신이 선택할 수있는 여러 가지 구현이 있지만, 실제로는이 양식 나무에서 이루어집니다. 나는 이것에 대해 자세히 갈거야,하지만 당신은 그것에 대해 더 알고 싶다면, 당신은 "축 정렬 경계 상자 나무"또는 짧은 "AABB 트리"에서 검색 할 수 있습니다.
The term "AABB" is quite often used in collision detection (in relation to the broad phase). This simply refers to the bounding box, just like we've used in the previous few tutorials. The bounds only consist of a location (the center) and it's dimensions. It doesn't contain rotation, which makes it very easy (and cheap) to check if two bounding boxes overlap.
용어 "AABB는"매우 자주 (넓은 상과 관련하여) 충돌 감지에 사용됩니다. 이것은 단순히 우리가 이전 몇 튜토리얼에서 사용했던 것처럼, 경계 상자를 의미합니다. 경계는 단지 위치 (중심)으로 구성되어 있으며 크기입니다. 이 두 경계 상자가 겹치는 경우 매우 쉽게 (저렴한)를 확인 할 수 있습니다 회전을 포함하지 않습니다.
Of course the tree has to be stored somewhere and updated when an object is added, removed or transformed. Luckily Bullet provides a nice class which does this all for us, called a collision world. Basically you tell the world which broad phase and near phase you want to use, next you can add, remove or transform collision objects and the collision world will notify you (through the ContactListener) when a collision occurs. Let's add a collision world, including a broad phase:
물론 나무는 어딘가에 저장되고 객체가 추가, 제거 또는 변형 될 때 업데이트해야합니다. 다행히 총알은 우리 모두를 위해이 작업을 수행하는 좋은 수업을 제공하는 충돌의 세계를했다. 추가, 제거 또는 변형 충돌 물체와 충돌 세계합니다 (을 통해 당신을 통지 할 것입니다 수 있습니다 옆에 기본적으로 당신은 넓은 위상과 주변의 위상을 사용할 알리기 ContactListener충돌이 발생하는 경우). 의이 넓은 상을 포함, 충돌의 세계를 추가 할 수 있습니다 :
public class BulletTest implements ApplicationListener {
    ...
    btBroadphaseInterface broadphase;
    btCollisionWorld collisionWorld;

    @Override
    public void create () {
        ...
        collisionConfig = new btDefaultCollisionConfiguration();
        dispatcher = new btCollisionDispatcher(collisionConfig);
        broadphase = new btDbvtBroadphase();
        collisionWorld = new btCollisionWorld(dispatcher, broadphase, collisionConfig);
        contactListener = new MyContactListener();

        instances = new Array<GameObject>();
        GameObject object = constructors.get("ground").construct();
        instances.add(object);
        collisionWorld.addCollisionObject(object.body);
    }

    public void spawn () {
        ...
        instances.add(obj);
        collisionWorld.addCollisionObject(obj.body);
    }

    @Override
    public void render () {
        final float delta = Math.min(1f / 30f, Gdx.graphics.getDeltaTime());

        for (GameObject obj : instances) {
            if (obj.moving) {
                obj.transform.trn(0f, -delta, 0f);
                obj.body.setWorldTransform(obj.transform);
            }
        }

        collisionWorld.performDiscreteCollisionDetection();
        ...
    }

    // Remove the checkCollision method, it's no longer needed

    @Override
    public void dispose () {
        ...
        collisionWorld.dispose();
        broadphase.dispose();
        ...
    }
    ...
}
View full source code data-on Github
Here we create btBroadphaseInterface and btCollisionWorld. For the broad phase I've chosen the btDbvtBroadphase implementation, which is a dynamic bounding volume tree implementation. In most scenario's this implementation should suffice. Next we need to add the ground and other objects that we create in the spawn method to the collision world, using the collisionWorld.addCollisionObjectmethod. I've removed the checkCollision method, instead we now call collisionWorld.performDiscreteCollisionDetection();. This method will check for collision between all objects that we've added to the world and will call the ContactListener when there's a collision.
여기에서 우리는 생성 btBroadphaseInterface하고 btCollisionWorld. 넓은 위상 I는 선택한 btDbvtBroadphaseA는 구현 D ynamic ㄴ ounding 브이 olume의 t의 세개 구현. 대부분의 시나리오에서이 구현은 충분해야합니다. 다음으로 우리는 우리가에서 만든 지상 및 기타 개체 추가해야 spawn사용하여 충돌 세계 방법을 collisionWorld.addCollisionObject방법을. 내가 삭제 한 checkCollision대신 우리가 지금 전화 방법collisionWorld.performDiscreteCollisionDetection(); .이 방법은 우리가 세계에 추가 한과를 호출하는 모든 객체 사이의 충돌을 확인합니다 ContactListener충돌이있을 때.
Well that's nice, we now don't have to create any object to detect the collision, so the garbage collection will not kick in. Also, if you look at the actual bullet related code, you'll see that it is just a few lines of code. Most of the code we created, is related to rendering and managing game objects.
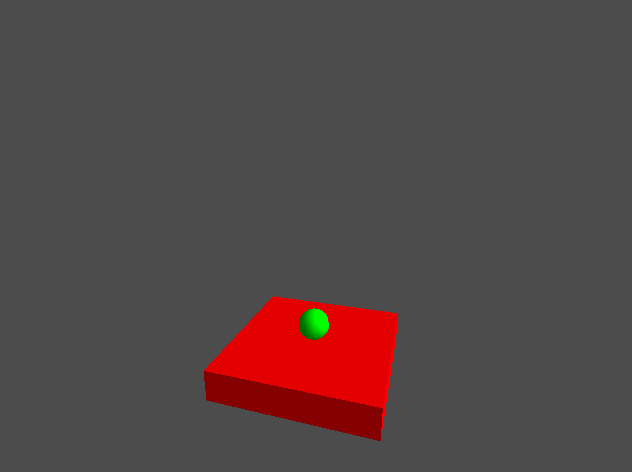
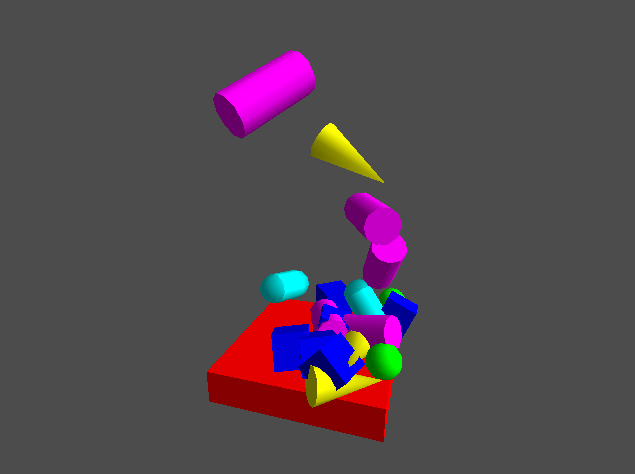
If you run this, you'll see that it does the same as before... sort of:
우물이 좋다, 우리가 충돌을 감지하는 모든 개체를 만들 필요가 없습니다, 그래서 가비지 컬렉션에 걷어차하지 않습니다. 또한, 실제 총알 관련 코드를 보면, 당신은 단지 몇 것을 볼 수 있습니다 코드 라인. 우리가 만든 코드의 대부분은, 렌더링 및 게임 객체를 관리하는 관련이있다.
당신이 이것을 실행하면, 당신은 이전과 ... 종류의 같은 않는 것을 볼 수 있습니다 :

Collision filtering
Because the world detects collision between all objects and not data-only the ground, the objects now also stop moving when they collide to each other. It shouldn't be too hard to fix that:
세상의 모든 개체 및뿐만 아니라 접지 사이의 충돌을 감지하기 때문에, 오브젝트는 이제 그들이 서로 충돌 할 때 이동 중지합니다. 그 문제를 해결하기 위해 너무 열심히해서는 안됩니다 :
    class MyContactListener extends ContactListener {
        @Override
        public boolean onContactAdded (int userValue0, int partId0, int index0, int userValue1, int partId1, int index1) {
            if (userValue1 == 0)
                instances.get(userValue0).moving = false;
            else if (userValue0 == 0)
                instances.get(userValue1).moving = false;
            return true;
        }
    }
We know that the ground has a userValue of zero. We now check if one of the objects that collide is the ground and if so, we stop moving the other object. Because it is possible that either of the objects is the ground, we need to check both values.
우리는 땅이 0의 userValue을 가지고 있음을 알고있다. 우리는 지금 충돌 개체 중 하나는 땅이 있는지 확인하고 만약 그렇다면, 우리는 다른 물체를 이동 중지합니다. 이 객체의 하나가 땅입니다 가능성이 있기 때문에, 우리는 두 값을 모두 확인해야합니다.
While that works for our test, it's not a very generic solution. Even more, the world still has to perform both the broad phase and near phase collision detection on the pairs that we want to ignore. It would be better to tell the world that it can simply ignore the objects against each other and only has to check for each object if it collides with the ground. One very efficient way to do this, is using collision flags:
즉 우리의 시험 작동하지만, 그것은 매우 일반적인 해결책이 아니다. 더욱, 세계는 여전히 우리가 무시하려는 쌍 넓은 위상과 주변의 위상 충돌 감지를 모두 수행 할 수있다. 단순히 서로에 대한 개체를 무시하고 단지는 지상과 충돌하는 경우 각 개체에 대해 확인해야 할 수있는 세계에게 더 나은 것입니다. 한 매우 효율적인 방법은 충돌 플래그를 사용하고,이 작업을 수행합니다 :
public class BulletTest implements ApplicationListener {
    final static short GROUND_FLAG = 1<<8;
    final static short OBJECT_FLAG = 1<<9;
    final static short ALL_FLAG = -1;
    ...
    @Override
    public void create () {
        ...
        collisionWorld.addCollisionObject(object.body, GROUND_FLAG, ALL_FLAG);
    }

    public void spawn () {
        ...
        collisionWorld.addCollisionObject(obj.body, OBJECT_FLAG, GROUND_FLAG);
    }
View full source code data-on Github
Here we created three flags. The first data-one GROUND_FLAG has data-only the ninth bit set. The second data-one OBJECT_FLAG has data-only the tenth bit set. The last data-one ALL_FLAG has all bits set. Next, when adding the ground to the world, we tell Bullet which flag to use for this particular object and to which objects the object can collide. So the ground collides will all objects. When spawning an object we tell Bullet that the object should only collide with the ground. Bullet uses a bitwise comparison to check if it should detect collision between two objects. If you're unfamiliar with bitwise comparison, I'd advise to read into it, it is a very useful and fast method, not only for collision filtering.
여기에서 우리는 세 가지 플래그를 만들었습니다. 첫번째는 GROUND_FLAG단지 아홉 번째 비트 세트를 갖는다. 두 번째는 OBJECT_FLAG오직 열 번째 비트 세트를 갖는다. 마지막 하나는 ALL_FLAG설정된 모든 비트를 가지고있다. 세계에 땅을 추가 할 때 다음으로, 우리는 깃발이 특정 목적을 위해 사용하고 물체가 충돌 할 객체에있는 총알을 말한다. 그래서 땅은 모든 물체를 충돌. 객체를 산란 때 우리는 객체는지면과 충돌해야 총알을 말한다. 탄환은 두 물체의 충돌을 검출하는 경우는 체크 비트 단위 비교를 사용한다. 당신이 비트 비교에 익숙하지 않은 경우, 나는 그것으로 읽어 좋을 걸, 그것은뿐만 아니라 충돌 필터링을위한 매우 유용하고 빠른 방법입니다.
So, why did I start at the ninth bit and not the first? The answer is: just to be safe. Bullet uses internally a few bits, as described here. While this doesn't have to be a problem, it's generally better to use bits which aren't used for anything else. Note that the flags are short values, so the bits are relatively scarce, it is advised to choose them carefully.
그럼, 왜 나는 아홉 번째 비트에서 시작하고 처음하지 않았다? 답은 안전을 할 수 있습니다. 총알 바와 같이, 몇 비트 내부적으로 사용 여기 . 이 문제가없는 반면, 다른 용도로 사용되지 않는 비트를 사용하는 것이 일반적으로 좋습니다. 플래그는 참고 short값 때문에 비트가 상대적으로 부족하다, 신중하게 선택하는 것이 좋습니다.
What's next
This concludes this first part on using the LibGDX Bullet wrapper. In the next part we'll look at rigid body dynamics, where we'll use Bullet for full physics simulation. For example applying forces/gravity and let objects interact with each other.
이것은 LibGDX 총알 래퍼를 사용하는 방법에 대한이 첫 번째 부분을 결론 지었다. 에서 다음 부분 우리는 우리가 전체 물리 시뮬레이션을 위해 총알을 사용합니다 강체 역학, 살펴 보겠습니다. 예를 들어 힘 / 중력을 적용하고하자 개체가 서로 상호 작용을한다.
Of course, it's impossible to cover every aspect of collision detection in this tutorial. For example, it is possible to use Bullet for more accurate ray picking, than we've seen in the previous tutorial. You could even use Bullet for frustum culling (although that's not advised).
물론,이 튜토리얼에서 충돌 감지의 모든 측면을 포함하는 것은 불가능하다. 예를 들어, 우리가 이전 튜토리얼에서 본 것보다 더 정확한 선 따기 위해 총알을 사용하는 것이 가능하다. (즉,이 조언 아니에요하지만) 당신은 컬링 프러스 텀에 총알을 사용할 수 있습니다.
I highly suggest to read the Bullet manual, it is a good read and the place to start when using the Bullet library. It isn't targeted to the LibGDX Bullet wrapper, but of it still applies.
내가보기 엔 읽기하는 것이 좋습니다 총알 설명서를 , 좋은 읽기와 글 머리 기호 라이브러리를 사용할 때 시작하는 장소입니다. 그것은 LibGDX 총알 래퍼를 대상으로,하지만 여전히 적용으로하지 않습니다.
The Bullet website and especially the Bullet wiki provides a lot of practical information, for example about the various collision shapes, contact callbacks and collision filtering. Also the forum is quite active.
This wiki page provides a lot of information specifically for the LibGDX Bullet wrapper.
총알 웹 사이트 , 특히 총알 위키 [정보, 예를 들어, 실제 많은 정보를 제공하는 다양한 충돌 모양 , 접촉 콜백 과 충돌 필터링 . 또한 포럼 매우 활성화되어 있습니다.
이 위키 페이지는 LibGDX 총알 래퍼 위해 특별히 많은 정보를 제공합니다.
Next: Using the libGDX 3D physics Bullet wrapper - part2
'Bullet Physics' 카테고리의 다른 글
| Aiming a projectile at a moving target (움직이는 표적에 발사체 조준 ) (0) | 2021.04.18 |
|---|---|
| Bullet physics - dynamic world with libgdx (0) | 2021.03.25 |
| BulletQuickstart (0) | 2020.12.15 |
| Actions: Vehicles & Character Controller (0) | 2020.12.03 |
| Constraints (0) | 2020.12.03 |


댓글