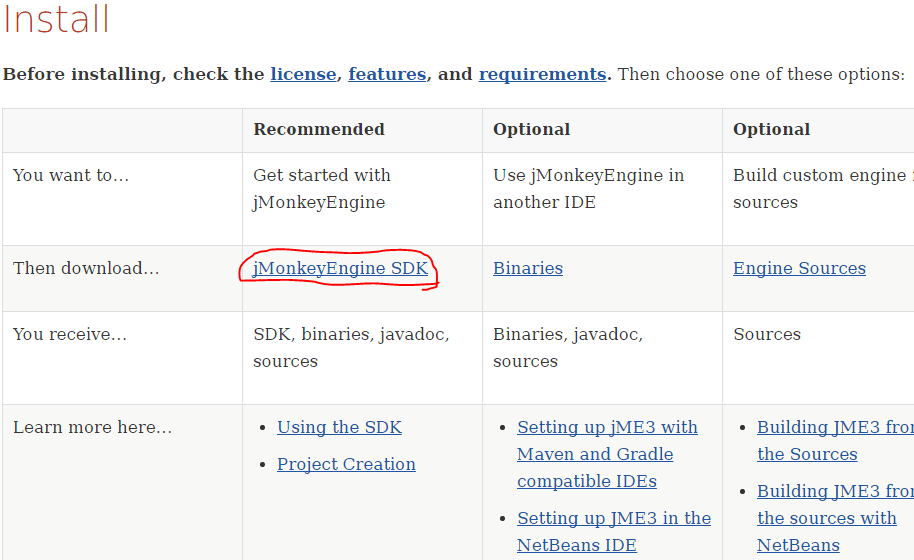
Install sdk from the Jmonkey wiki.
Jmonkey wiki 에서 sdk를 설치합니다.
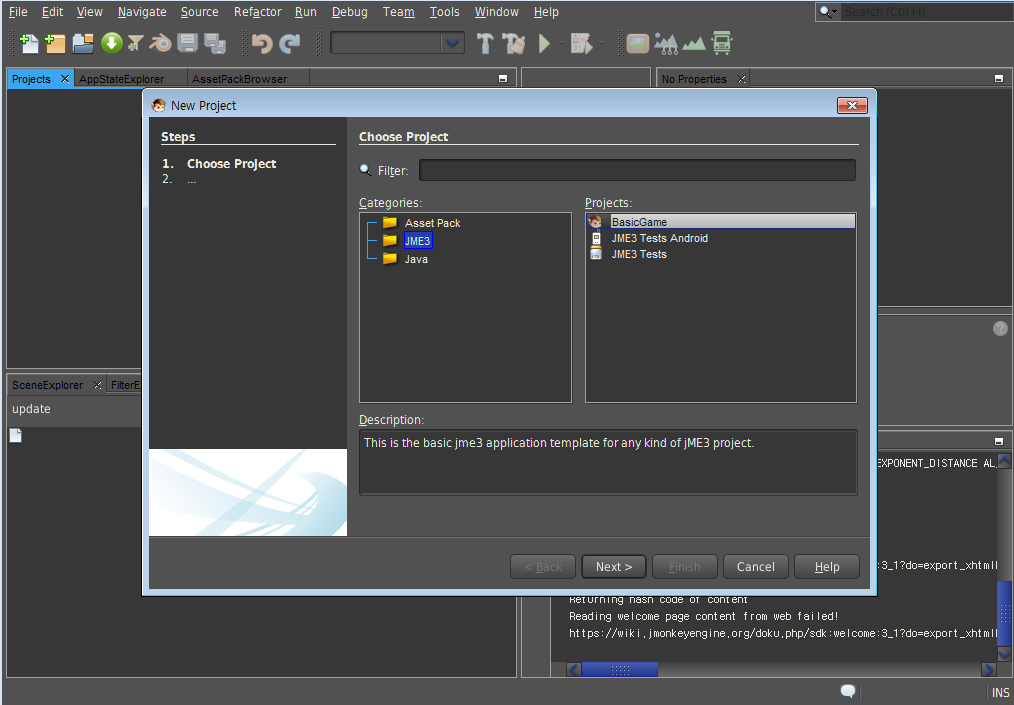
Create a new project with new Project-> JME3-> BasicGame.
new Project -> JME3 -> BasicGame 으로 새 프로젝트를 만듭니다.
Press the arrow to run
화살표를 눌러 실행해봅니다
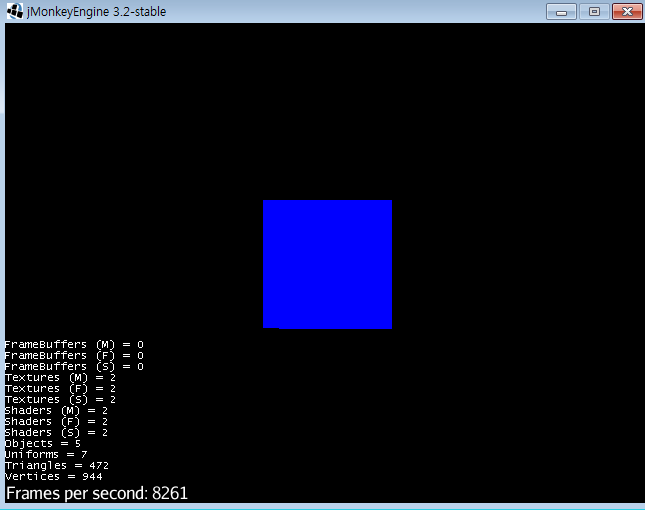
It's a bit unnatural because it takes up all the input. I think it's because Jmonkey started a program for desktop. First change the input.
실행화면이 나오는데 입력을 모두 가져가기 때문에 약간 부자연스럽습니다. Jmonkey가 desktop용 프로그램을 시작되어서 그런것 같습니다. 먼저 입력을 바꿔봅니다.
For initial execution, please refer to the following tutorial 1-3.
초기실행은 다음 tutorial 1-3을 참고했습니다.
https://www.youtube.com/watch?v=h6Xl3MRjMLM
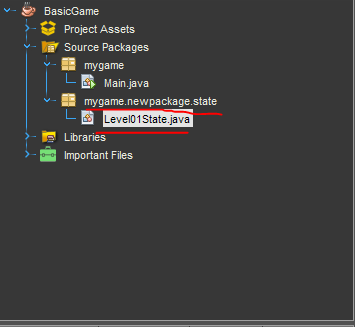
Right click on mygame in Source Packages to add new package and start it.
Source Packages 의 mygame에 우클릭하여 새로운 패키지 newpackage를 추가하고 시작합니다.
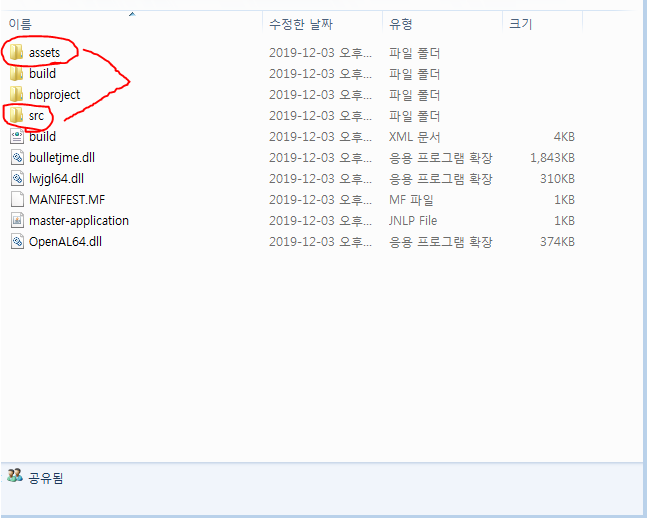
Source Packages is the same as the src of the actual folder.
Source Packages는 실제 폴더의 src와 동일합니다.
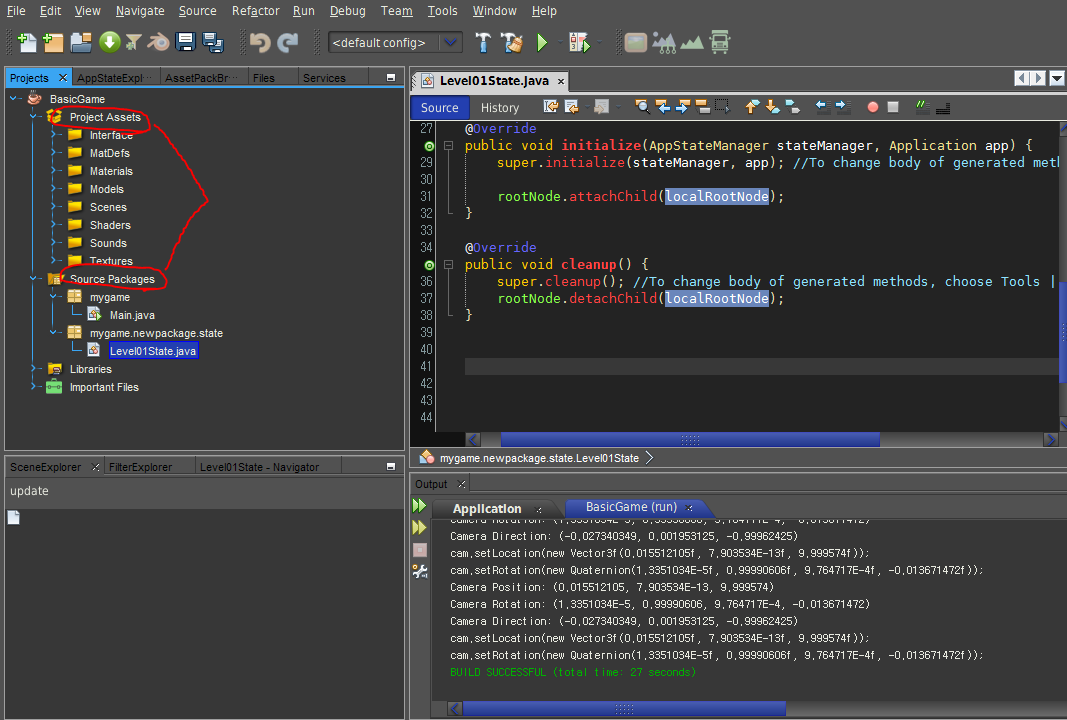
Create a package called newpackage.state and create a Level01State.java file as follows:
다음처럼 newpackage.state 라는 패키지를 만들고 Level01State.java 파일을 생성합니다.
Modify the source as follows:
다음처럼 소스를 수정합니다.
|
1
2
3
4
5
6
7
8
9
10
11
12
13
14
15
16
17
18
19
20
21
22
23
24
25
26
27
28
29
30
31
32
33
34
35
36
37
38
39
40
41
42
43
44
45
46
47
48
49
50
51
52
53
54
55
56
57
58
59
60
61
|
public class Level01State extends AbstractAppState{
private final Node rootNode;
private final Node localRootNode = new Node("Level 1");
private final AssetManager assetManager;
private final InputManager inputManager;
private final FlyByCamera flyByCamera;
private final Camera camera;
private ChaseCamera chaseCamera;
public Level01State(SimpleApplication app) {
rootNode = app.getRootNode();
assetManager = app.getAssetManager();
inputManager = app.getInputManager();
flyByCamera = app.getFlyByCamera();
camera = app.getCamera();
}
@Override
public void initialize(AppStateManager stateManager, Application app) {
super.initialize(stateManager, app); //To change body of generated methods, choose Tools | Templates.
rootNode.attachChild(localRootNode);
inputManager.addListener(actionListener);
flyByCamera.setEnabled(false);
chaseCamera = new ChaseCamera(camera, localRootNode, inputManager);
Box b = new Box(1, 1, 1);
Geometry geom = new Geometry("Box", b);
Material mat = new Material(assetManager, "Common/MatDefs/Misc/Unshaded.j3md");
mat.setColor("Color", ColorRGBA.Blue);
geom.setMaterial(mat);
localRootNode.attachChild(geom);
}
private final ActionListener actionListener = new ActionListener() {
@Override
public void onAction(String name, boolean keyPressed, float tpf) {
}
};
@Override
public void cleanup() {
rootNode.detachChild(localRootNode);
super.cleanup();
}
@Override
public void update(float tpf) {
}
}
|
cs |
|
1
2
3
4
5
6
7
8
9
10
11
12
13
14
15
16
17
18
19
20
21
22
23
|
public class Main extends SimpleApplication {
public static void main(String[] args) {
Main app = new Main();
app.start();
}
@Override
public void simpleInitApp() {
stateManager.attach(new Level01State(this));
}
@Override
public void simpleUpdate(float tpf) {
//TODO: add update code
}
@Override
public void simpleRender(RenderManager rm) {
//TODO: add render code
}
}
|
cs |
As soon as you start, the main screen just throws you into Level01State.
Level01State extends AbstractAppState, which can be thought of as one page. When there is a scene change,
The stateManager is expected to be attached and detached. Jmonkey is said to recognize all elements (scenes, characters) as "Nodes". The top-level "Node" becomes the first executor "Main", which extends "SimpleApplication". You can see that "SimpleApplication" is a node with RootNode, AssetManager, InputManager, FlyByCamera, Camera, ... etc. Level01State is just getting from the first run.
메인화면은 시작하자마자 단지 본인을 Level01State라는 곳으로 던져줍니다.
Level01State는 AbstractAppState를 확장하는데, 이는 하나의 페이지 정도로 생각하면 되겠습니다. 장면 변화가 있을때,
stateManager가 뗐다 붙였다 할것으로 예상됩니다. 그리고 Jmonkey는 모든 요소(장면, 케릭터) 를 "Node" 라는 것으로 인식한다고 합니다. 그 최상위 "Node" 는 바로 첫 실행자 "Main" 이되고, 이는 "SimpleApplication" 을 확장하고 있습니다. "SimpleApplication" 이 RootNode, AssetManager, InputManager, FlyByCamera, Camera, ... etc 모두를 가지는 하나의 노드라는것을 알수 있습니다. Level01State 첫 실행에서 그냥 가져오고 있습니다.
And AbstractAppState creates a page, which itself does update (). This is a small rendering part, and you can think of simpleRender as the whole unified rendering in Main.java.
I've disabled flyCam and connected chaseCam.
chaseCamera = new ChaseCamera (camera, localRootNode, inputManager);
The second parameter is the target to be chased, just now none, so we hooked up to localRootNode. Because every element is a Node. Here we can just think of localRootNode as a scene.
And I originally added the basic code.
그리고, AbstractAppState 은 하나의 페이지를 만드는데, 자체적으로 update()를 하고 있습니다. 이 부분이 작은 rendering 부분이고, Main.java 에서 simpleRender 가 전체적인 통일 rendering 을 한다고 생각할 수 있습니다.
flyCam 을 disable 해버리고, chaseCam 을 연결했습니다.
chaseCamera = new ChaseCamera(camera, localRootNode, inputManager);
두번째 파라메터는 쫓는 대상인데, 그냥 지금은 없음으로, localRootNode 에 연결시켰습니다. 모든 요소가 Node 이니까요. 여기서는 그냥 localRootNode을 scene으로 생각하면 되겠네요.
그리고, 원래 기본 코드를 붙였습니다.
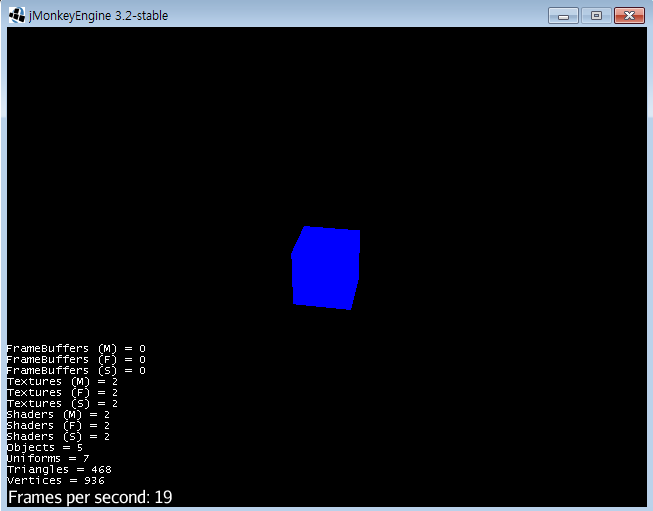
It's a little plain running screen.
Next, let's attach a basic physics engine.
조금 평범한 실행화면이 되네요.
다음으로 기본적인 물리 엔진을 붙여봅니다.
========================================
Project Assets -> Scenes -> right click -> others -> Scene -> Empty JME3 Scene
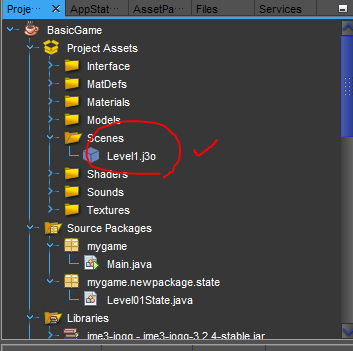
Level1.j3o -> right click -> Edit in SceneComposer
SceneExplorer : Scene Root -> right click -> Add Spacial -> Primitive -> Box & Sphere
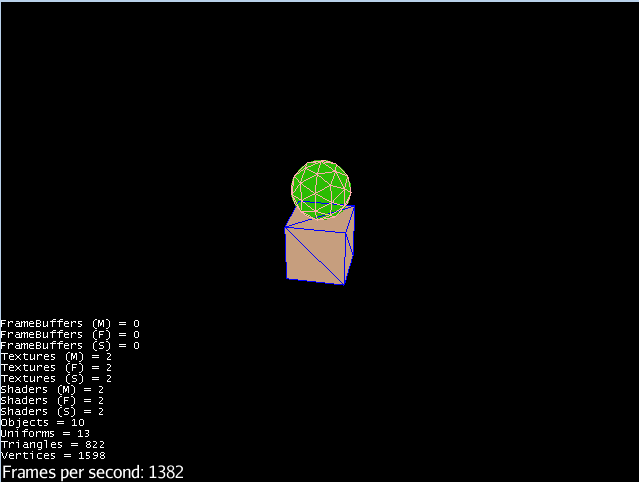
Sphere select : Sphere - Properties LocalTraslation -> (0, 5, 0)
Box select : "add collision shape" click -> PhysicsControl - Properties -> mass : 0.0

Three.js and libgdx in my blog have a very similar structure. Think of the box as solid ground and drop the sphere.
저의 블로그의 three.js 와 libgdx가 거의 유사한 구조를 만들고 있습니다. 박스는 단단한 땅으로 생각하고, 구를 떨어뜨리겠습니다.
|
1
2
3
4
5
6
7
8
9
10
11
12
13
14
15
16
17
18
19
20
21
22
23
24
25
26
27
28
29
30
31
32
33
34
35
36
37
38
39
40
41
|
private final Node rootNode;
private final Node localRootNode = new Node("Level 1");
private final AssetManager assetManager;
private final InputManager inputManager;
private final FlyByCamera flyByCamera;
private final Camera camera;
private ChaseCamera chaseCamera;
private BulletAppState bulletAppState;
private CharacterControl sphereControl;
@Override
public void initialize(AppStateManager stateManager, Application app) {
super.initialize(stateManager, app); //To change body of generated methods, choose Tools | Templates.
rootNode.attachChild(localRootNode);
inputManager.addListener(actionListener);
flyByCamera.setEnabled(false);
chaseCamera = new ChaseCamera(camera, localRootNode, inputManager);
bulletAppState = new BulletAppState();
bulletAppState.setDebugEnabled(true);
stateManager.attach(bulletAppState);
Spatial scene = assetManager.loadModel("Scenes/Level1.j3o");
localRootNode.attachChild(scene);
Spatial box = localRootNode.getChild("Box");
bulletAppState.getPhysicsSpace().add(box.getControl(RigidBodyControl.class));
Spatial sphere = localRootNode.getChild("Sphere");
SphereCollisionShape sphereShape = new SphereCollisionShape(1);
sphereControl = new CharacterControl(sphereShape, 1.0f);
sphereControl.setGravity(new Vector3f(0, -10f, 0));
sphere.addControl(sphereControl);
bulletAppState.getPhysicsSpace().add(sphereControl);
}
|
cs |
Modify the source as above.
Although modified in the form of the Jmonkey SDK, the basic flow is no different from the collision handling of three.js or libgdx.
It seems to set the dynamics world only with the declaration of BulletAppState. setDebugEnabled will show the collision wire-frame.
Box adds PhysicsControl to SceneComposer's visual tool, and Sphere adds code.
bulletAppState.getPhysicsSpace (). add () code is expected to add that rigid body to the dynamics world.
위처럼 소스 수정합니다.
Jmonkey SDK의 형태로 변형되었지만, 기본흐름은 three.js나 libgdx 의 collision 처리와 다르지 않습니다.
BulletAppState 의 선언만으로 dynamics world 설정을 하는것으로 보입니다. setDebugEnabled 는 충돌 wire-frame 을 보여줄것입니다.
박스는 SceneComposer의 비쥬얼툴로 PhysicsControl을 추가했고, Sphere는 코드로 추가하고 있는것입니다.
bulletAppState.getPhysicsSpace().add() 코드는 dynamics world에 해당 rigid body를 추가하는것으로 예상됩니다.
'Etc' 카테고리의 다른 글
| 개인 정보 처리 방침 (0) | 2020.06.13 |
|---|---|
| Jmonkey into Intellij (for android development) (0) | 2019.12.04 |
| adMob - reward, libgdx (0) | 2019.11.30 |
| adMob - interstitial, libgdx (0) | 2019.11.30 |
| adMob - banner, libgdx (0) | 2019.11.23 |


댓글